I2CU Game Machine
One of the key challenges of learning to game program with an Arduino is figuring out a reliable set of
components.
They need to be readily available and affordable. They also need to be easy to assemble. This simple kit
consists of
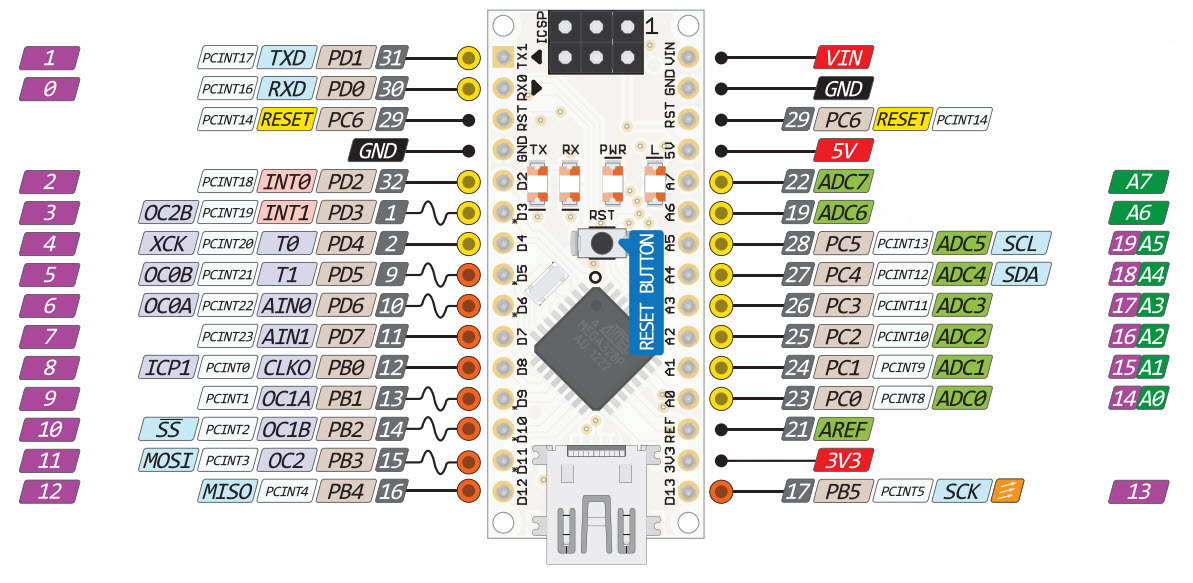
3 primary components: an Arduino Nano, a 128x64 pixel i2c OLED, and an adapter to plug in a Wii Nunchuck
which is also
an i2c device. 8 wires connect them togeter and then you can hot glue them in place on a small
breadboard.
No soldering required. Depending on where you source the parts, the total cost is between 11 and 20 USD
with the
most expensive part being the Wii Nunchuck. Generic ones can be bought on Amazon for around $5.
This PDF contains step by step directions for assembling the I2CU game machine. There are only 8 wires required because the
Wii Nunchuk and OLED both use the same I2C lines going into the Arduino. They are connected in parallel.
This is the display driver for the 128x64 pixel OLED with an I2C controller. A number of functions have
been
added that make it easy to put sprites and text on the screen. Codepage437 and LCD1602 are two font sets
that will
be very useful for getting started with game programming on the Arduino. Code Page 437 is the old IBM
set of
characters which was designed with games in mind. LCD 1602 is the character set found on standard 1602
Character
Displays. Code Page 437 is a larger font with more character. LCD 1602 is a smaller font with fewer
characters but
you can get more on the screen.
This is the driver for the Wii Nunchuk controller.
A blank INO project with all the core files to get you stated. Includes ReadController and RenderDisplay
which take care of controller input and demonstrate rendering text to the screen.
